Ever wondered how you can tap into the power of nature to improve your health and well-being? Look no further! In this article, we will explore the wonderful world of natural medicine and discover the best plants to grow in your very own garden. From soothing chamomile to immune-boosting echinacea, these powerful herbs and plants have been used for centuries to promote healing and alleviate various ailments. Whether you’re a seasoned gardener or a beginner, we’ve got you covered with simple tips and tricks to ensure successful growth. Get ready to cultivate your very own natural medicine cabinet right at home!
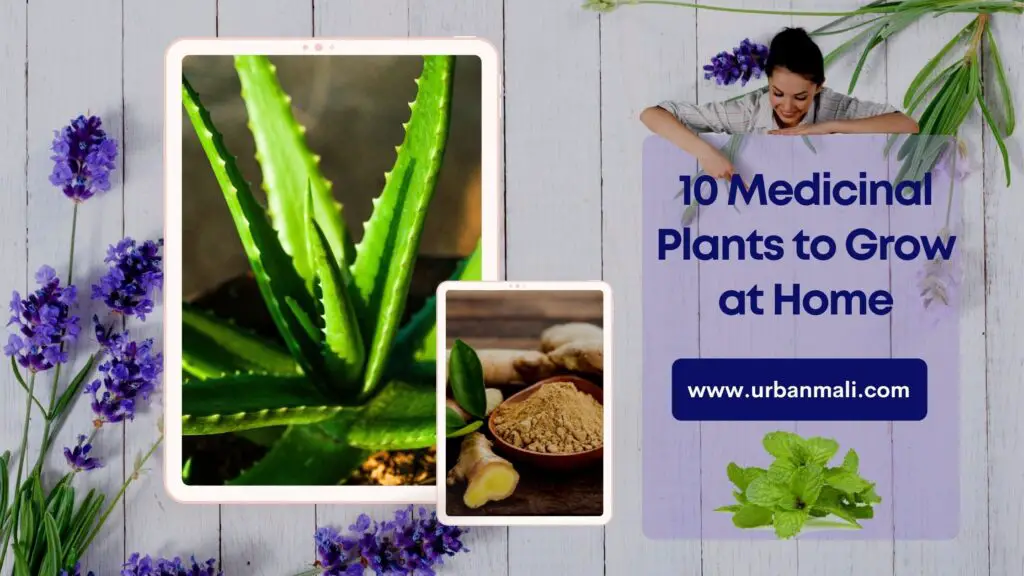
Aloe Vera
Aloe vera is a versatile plant that offers numerous benefits for your health and wellbeing. Known for its soothing and healing properties, aloe vera is commonly used in various skin care products. However, its benefits go beyond just topical applications.
Benefits of Aloe Vera
Aloe vera has been used for centuries to treat a wide range of health issues. Here are some of the key benefits associated with this miraculous plant:
-
Soothing Sunburns: Aloe vera gel is renowned for its ability to relieve the pain and inflammation caused by sunburns. Its cooling properties help soothe the skin and promote faster healing.
-
Enhancing Skin Health: Aloe vera is an excellent moisturizer and can help improve the texture and appearance of your skin. It aids in reducing acne, wrinkles, and other skin conditions, leaving you with a healthier and more radiant complexion.
-
Boosting Digestion: Consuming aloe vera juice can have a positive impact on your digestive system. It helps alleviate symptoms of acid reflux, constipation, and irritable bowel syndrome, promoting a healthier gut.
-
Strengthening the Immune System: Aloe vera contains a variety of antioxidants, vitamins, and minerals that help strengthen your immune system, protecting your body against illnesses and infections.
-
Reducing Inflammation: Aloe vera possesses anti-inflammatory properties, making it beneficial for those suffering from conditions such as arthritis. It can help reduce pain and inflammation in the joints.
How to Grow Aloe Vera
Growing aloe vera is relatively simple, and it can be done both indoors and outdoors. Here’s how you can cultivate your own aloe vera plant:
-
Choosing the Right Pot: Select a well-draining pot or container, as aloe vera prefers dry soil and excessive water can cause the roots to rot. Ensure that the pot has drainage holes at the bottom.
-
Preparing the Soil: Use a cactus or succulent mix that provides excellent drainage. Alternatively, you can create your own mixture by combining equal parts of sand, perlite, and peat-based potting soil.
-
Planting the Aloe Vera: Gently remove a mature aloe vera pup (a small offshoot of the main plant) from the mother plant. Allow the pup to dry for a day or two before placing it in the prepared pot.
-
Providing Adequate Light: Aloe vera thrives in bright, indirect sunlight. Place your plant near a window where it can receive ample sunlight. However, be cautious of intense sunlight that can scorch the plant’s leaves.
-
Watering and Maintenance: Allow the soil to dry completely before watering your aloe vera plant. It is best to underwater rather than overwater, as aloe vera is drought-tolerant. Water sparingly during winter months.
-
Harvesting and Using Aloe Vera: Once your aloe vera plant has matured, you can harvest its leaves as needed. Cut off a leaf close to the base and use a spoon to scoop out the gel. Apply it topically or consume it for its health benefits.
By following these simple steps, you can grow your own aloe vera plant and enjoy its numerous health benefits.
Peppermint
Peppermint is not only a refreshing herb but also a powerhouse of medicinal benefits. With its invigorating scent and cooling flavor, peppermint has been used for centuries as a natural remedy for various ailments.
Benefits of Peppermint
-
Relieving Digestive Discomfort: Peppermint has a soothing effect on the digestive system, helping to alleviate symptoms such as bloating, indigestion, and stomach cramps. It can also assist in reducing nausea and vomiting.
-
Easing Headaches and Migraines: The menthol present in peppermint has analgesic properties that can help relieve tension headaches and migraines. Applying peppermint oil topically or inhaling its aroma can provide quick relief.
-
Clearing Respiratory Issues: Peppermint contains menthol, which acts as an expectorant, helping to thin mucus and alleviate congestion. It is commonly used to provide relief from colds, coughs, sinusitis, and bronchitis.
-
Improving Focus and Mental Clarity: The aroma of peppermint has been found to enhance cognitive function, boost alertness, and improve memory. Inhaling peppermint oil or drinking peppermint tea can help increase mental sharpness.
-
Soothing Muscle Pain: The cooling properties of peppermint can provide relief from muscle pain and spasms. Applying peppermint oil topically on affected areas can help reduce inflammation and discomfort.
How to Grow Peppermint
Growing peppermint is relatively easy, making it a perfect addition to any garden. Here’s how you can successfully grow your own peppermint plant:
-
Selecting a Planting Location: Peppermint thrives in areas with partial shade, but it can also adapt to full sun. Choose a spot in your garden where the soil is well-drained, as peppermint cannot tolerate soggy conditions.
-
Preparing the Soil: Peppermint prefers slightly acidic soil with a pH range of 6.0 to 7.5. Before planting, amend your soil with organic matter such as compost or well-rotted manure to improve its fertility and drainage.
-
Planting Peppermint: You can grow peppermint from either seeds or transplants. If using seeds, sow them directly into the prepared soil. Alternatively, transplant seedlings or root divisions, ensuring you plant them at the same depth they were previously growing.
-
Watering and Maintenance: Peppermint requires regular watering to keep the soil moist but not waterlogged. Be mindful of the dryness of the soil and water whenever it feels dry to the touch. Mulching around the plant can help retain moisture.
-
Harvesting Peppermint: Once your peppermint plant has grown several inches tall, you can start harvesting its leaves. Simply snip off the desired amount of leaves, leaving a few inches of growth for regrowth. Use fresh leaves for cooking or drying.
By following these steps, you can easily grow your own peppermint plant and benefit from its medicinal properties.
Chamomile
Chamomile is a delicate herb with a plethora of therapeutic benefits. This gentle yet powerful plant has calming and soothing properties, making it a popular choice for natural remedies.
Benefits of Chamomile
-
Promoting Quality Sleep: The calming effects of chamomile can help combat insomnia and promote restful sleep. Drinking chamomile tea before bedtime can relax the mind and facilitate a peaceful night’s rest.
-
Soothing Digestive Issues: Chamomile is known for its anti-inflammatory properties, making it effective in relieving digestive ailments such as gas, bloating, and indigestion. It can also aid in relieving stomach cramps and irritable bowel syndrome (IBS).
-
Relieving Stress and Anxiety: Chamomile tea is often consumed to reduce stress and anxiety levels. It acts as a mild sedative, promoting relaxation and easing tension. Incorporate chamomile tea into your daily routine to experience its calming effects.
-
Treating Skin Conditions: Chamomile possesses anti-inflammatory and anti-bacterial properties, which can help soothe skin irritations and promote healing. It is commonly used to alleviate acne, eczema, and sunburns.
-
Supporting Immune Health: Chamomile tea contains various antioxidants that boost the immune system, helping the body fight against infections and illnesses. Regular consumption of chamomile tea can improve overall immune health.
How to Grow Chamomile
Growing chamomile requires minimal effort, and its delicate flowers can add beauty to your garden. Here’s how you can grow your own chamomile plants:
-
Choosing the Right Location: Chamomile requires full sun exposure to thrive. Select a sunny spot in your garden that receives at least 6 hours of direct sunlight daily.
-
Preparing the Soil: Chamomile prefers well-drained soil. Before planting, amend the soil with organic matter, such as compost or aged manure, to enhance its fertility and drainage capabilities.
-
Sowing Chamomile Seeds: Chamomile can be grown from seeds. Sow the seeds directly into the prepared soil, scattering them evenly. Gently press the seeds into the soil, as they require exposure to light to germinate.
-
Watering and Maintenance: Keep the soil moist but not waterlogged, especially during the germination phase. Once established, chamomile requires minimal watering, as it is drought-tolerant. Water at the base of the plant to avoid wetting the foliage.
-
Pruning and Harvesting: To encourage bushier growth, pinch back the tips of the chamomile plant when it reaches a height of 6-8 inches. Harvest the flowers when they are fully opened but before they begin to wilt. Dry the flowers to use as tea or for other herbal preparations.
By following these simple steps, you can cultivate your own chamomile plants and enjoy the numerous benefits that this delightful herb has to offer.
Echinacea
Echinacea, also known as purple coneflower, is a powerful herb that has been used for centuries as a natural remedy. Its vibrant flowers and potent medicinal properties make it a must-have in any herb garden.
Benefits of Echinacea
-
Strengthening the Immune System: Echinacea is widely recognized for its immune-boosting properties. It stimulates the production of white blood cells, enhancing the body’s ability to fight off infections, colds, and viruses.
-
Reducing the Duration of Colds: Studies have shown that echinacea can significantly reduce the duration and severity of cold symptoms. Taking echinacea supplements or drinking echinacea tea at the onset of a cold can help alleviate symptoms and promote faster recovery.
-
Fighting Respiratory Infections: Echinacea’s antiviral and antibacterial properties make it effective in combating respiratory infections such as bronchitis and sinusitis. It can help relieve congestion, reduce inflammation, and soothe irritated tissues.
-
Boosting Skin Health: Echinacea can be beneficial for various skin conditions, including acne, eczema, and psoriasis. Applying echinacea extract topically can help reduce inflammation, promote healing, and soothe irritated skin.
-
Supporting Overall Wellbeing: Echinacea has antioxidant properties that combat free radicals, reducing the risk of chronic diseases. It also has anti-inflammatory properties, aiding in joint health and reducing pain and swelling.
How to Grow Echinacea
Growing echinacea is relatively simple, and the beautiful flowers it produces will attract pollinators to your garden. Follow these steps to grow your own echinacea plants:
-
Selecting the Right Location: Echinacea thrives in full sun but can tolerate partial shade. Choose a sunny spot in your garden with well-drained soil.
-
Preparing the Soil: Echinacea prefers loose, well-drained soil. Before planting, amend the soil with compost or organic matter to improve its fertility and drainage. Avoid heavy clay soils, as they can lead to root rot.
-
Planting Echinacea: Echinacea can be grown from seeds or transplants. If starting from seeds, sow them directly into the prepared soil in early spring. If using transplants, space them 12-18 inches apart to provide enough room for growth.
-
Watering and Maintenance: Echinacea is drought-tolerant and does not require excessive watering. Water the plants regularly during their first year of growth to establish a strong root system. Once established, water only during dry spells.
-
Deadheading and Pruning: To promote continuous blooming, deadhead the faded flowers by cutting them back to a leaf or bud. In late fall or early spring, cut the dried stems back to ground level to encourage new growth in the following season.
-
Harvesting Echinacea: The aerial parts of echinacea, including the flowers, leaves, and stems, can be harvested for medicinal use. Harvest the plant when it reaches its peak flowering stage. Dry the harvested parts in a well-ventilated area and store them in airtight containers.
By following these steps, you can successfully grow your own echinacea plants and harness their powerful medicinal properties.
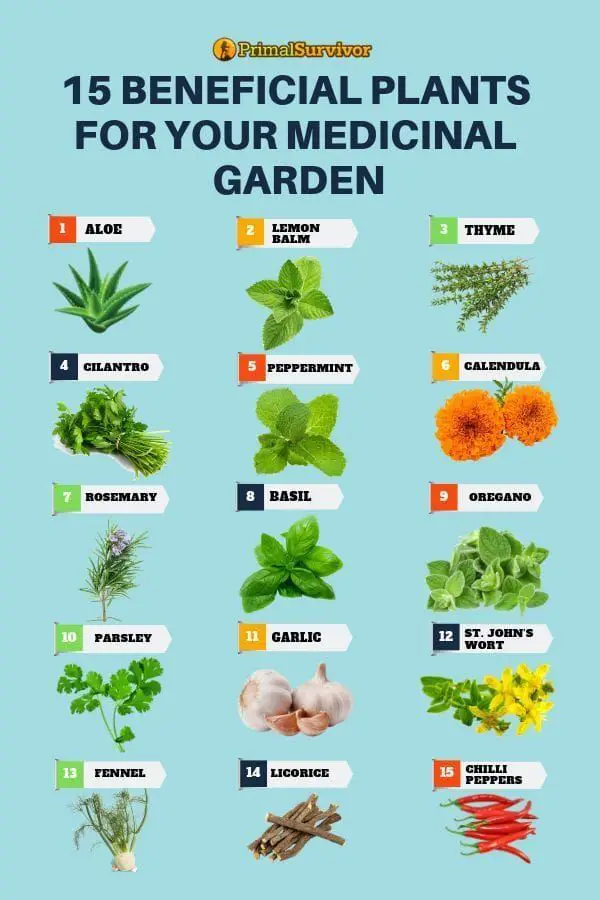
Lavender
Lavender is a fragrant herb that not only adds beauty to your garden but also offers a wide range of therapeutic benefits. Known for its calming aroma, lavender has been used for centuries to promote relaxation and enhance overall wellbeing.
Benefits of Lavender
-
Reducing Anxiety and Stress: Lavender is renowned for its soothing and calming properties. The scent of lavender has been shown to reduce anxiety levels and promote a sense of calm. Essential oils derived from lavender can be used in aromatherapy to alleviate stress and improve sleep quality.
-
Enhancing Sleep Quality: Lavender has a sedative effect, making it effective in improving sleep quality. Its aroma can promote a sense of relaxation and facilitate a deeper and more restful sleep.
-
Relieving Headaches and Migraines: The analgesic properties of lavender can help relieve tension headaches and migraines. Applying lavender essential oil to the temples or inhaling its aroma can provide quick relief from headache symptoms.
-
Soothing Skin Irritations: Lavender possesses anti-inflammatory and antiseptic properties, making it beneficial for various skin conditions. It can help soothe sunburns, insect bites, rashes, and minor cuts or wounds.
-
Alleviating Respiratory Issues: Lavender has expectorant properties that can help alleviate respiratory issues, such as coughs, colds, and congestion. Inhaling steam infused with lavender essential oil can provide relief from respiratory discomfort.
How to Grow Lavender
Growing lavender requires well-drained soil, plenty of sunlight, and minimal maintenance. Follow these steps to cultivate your own lavender plants:
-
Choosing the Right Location: Lavender thrives in full sun exposure, so select a sunny spot in your garden. Ensure the area has well-drained soil, as lavender does not tolerate excessive moisture.
-
Preparing the Soil: Lavender prefers sandy or loamy soil that is alkaline to neutral. Before planting, amend the soil with sand or gravel to improve drainage. If your soil is heavy clay, consider planting lavender in raised beds.
-
Planting Lavender: Lavender can be grown from seeds, cuttings, or transplants. If using seeds, sow them indoors 6-8 weeks before the last frost date. Transplants or cuttings can be planted directly into the prepared soil in spring or fall.
-
Watering and Maintenance: Lavender is drought-tolerant once established and does not require excessive watering. Water thoroughly after planting, but be mindful not to overwater. Lavender plants benefit from pruning in early spring to promote bushier growth.
-
Harvesting Lavender: Lavender flowers can be harvested when the buds have opened but before they start to wither. Cut the flower stems, leaving a few inches of growth on the plant. Hang the harvested stems upside down in a cool, dry place to dry.
By following these steps, you can successfully grow your own lavender plants and enjoy their delightful fragrance and numerous health benefits.
Garlic
Garlic is not only a staple in culinary dishes but also a potent medicinal herb. Its pungent flavor and numerous health benefits make it a valuable addition to any kitchen garden.
Benefits of Garlic
-
Boosting the Immune System: Garlic is packed with antioxidants and compounds, such as allicin, that can enhance the immune system’s response. Regular consumption of garlic can help strengthen your body’s ability to fight off infections and illnesses.
-
Lowering Blood Pressure: Studies have shown that garlic can help reduce high blood pressure levels. Allicin, present in garlic, possesses vasodilatory properties, promoting healthy blood flow and reducing the risk of cardiovascular diseases.
-
Improving Cholesterol Levels: Garlic can help lower LDL (bad) cholesterol while increasing HDL (good) cholesterol levels. This can contribute to a healthier heart and lower the risk of heart disease.
-
Combatting Common Colds and Infections: Garlic has natural antiviral, antibacterial, and antifungal properties that can assist in preventing and treating common colds, respiratory infections, and fungal infections.
-
Supporting Digestive Health: Garlic stimulates the production of digestive enzymes, aiding in better digestion. It can also help alleviate gastric issues such as bloating, indigestion, and stomach ulcers.
How to Grow Garlic
Growing garlic is a rewarding endeavor that can provide you with a fresh supply of this flavorful herb. Follow these steps to grow your own garlic:
-
Choosing the Right Garlic Variety: There are two main types of garlic: hardneck and softneck. Hardneck garlic produces a central stalk called a scape and larger cloves, while softneck garlic has smaller cloves and is often used for braiding. Choose a variety that suits your preferences and climate.
-
Preparing the Soil: Garlic thrives in well-drained soil that is rich in organic matter. Before planting, amend the soil with compost or well-rotted manure to enhance its fertility and drainage. Avoid compacted or waterlogged soils.
-
Planting Garlic: Garlic is typically planted in the fall, 4-6 weeks before the ground freezes. Separate the garlic cloves and plant them 2-3 inches deep, pointed end up, and 4-6 inches apart. Space the rows approximately 12 inches apart.
-
Providing Sunlight and Water: Garlic requires full sun exposure for optimal growth. Ensure that your garlic bed receives at least 6-8 hours of direct sunlight each day. Water the garlic whenever the soil feels dry, aiming for consistent moisture without overwatering.
-
Harvesting Garlic: Garlic is typically ready for harvest when the leaves turn yellow and start to dry out, usually 8-10 months after planting. Carefully dig up the bulbs, taking care not to bruise or damage them. Allow the bulbs to cure in a warm, dry, and well-ventilated area for several weeks before storing.
By following these steps, you can successfully grow your own garlic and enjoy its culinary and medicinal benefits.
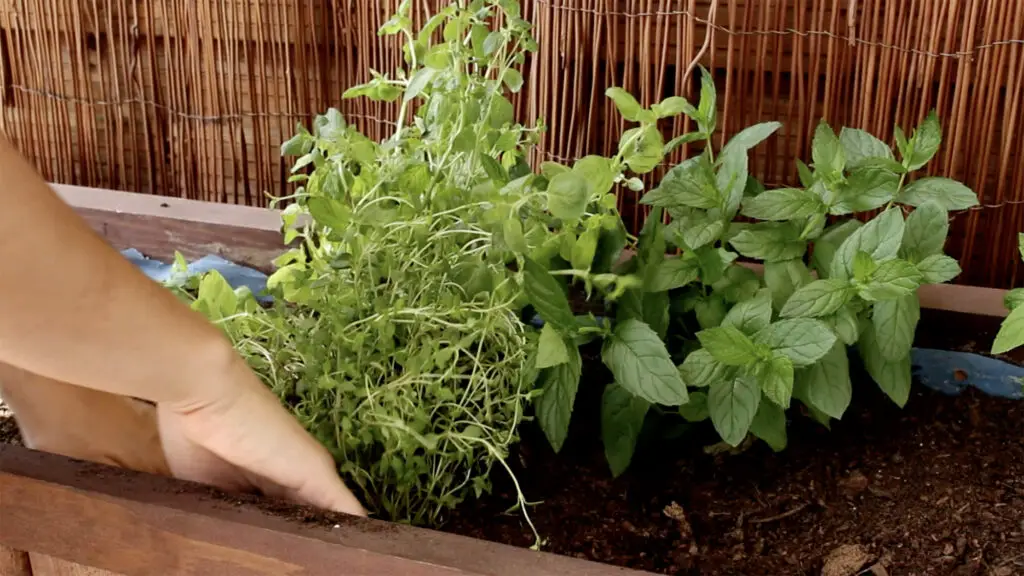
Ginger
Ginger is a versatile and aromatic herb that offers an array of health benefits. Whether used in cooking or as a natural remedy, ginger has been recognized for centuries for its healing properties.
Benefits of Ginger
-
Aiding Digestion: Ginger helps stimulate the production of digestive enzymes, promoting better digestion and reducing symptoms such as bloating, indigestion, and nausea. It can also alleviate morning sickness and motion sickness.
-
Reducing Inflammation: Ginger possesses potent anti-inflammatory properties that can help reduce inflammation in the body. It is particularly beneficial for those suffering from arthritis or other inflammatory conditions.
-
Relieving Nausea and Vomiting: Ginger has long been used to alleviate nausea and vomiting associated with pregnancy, chemotherapy, and motion sickness. Consuming ginger tea or ginger supplements can provide relief without the side effects of certain medications.
-
Boosting the Immune System: Ginger contains antioxidants that help strengthen the immune system, protecting the body against infections and illnesses. Consuming ginger regularly can contribute to overall improved health and wellbeing.
-
Improving Circulation: Ginger has the ability to improve blood circulation, promoting better oxygen and nutrient delivery throughout the body. This can enhance cardiovascular health and maintain optimal organ function.
How to Grow Ginger
While ginger is typically associated with tropical climates, it is possible to grow ginger in your own home, even if you don’t live in a warm region. Follow these steps to grow your own ginger:
-
Selecting a Rhizome: Purchase a fresh ginger rhizome from a reputable source or your local nursery. Choose a plump ginger root with tight skin and healthy buds.
-
Preparing the Rhizome: Soak the ginger rhizome in water overnight to stimulate growth. Cut the rhizome into smaller sections, ensuring each section has at least one bud or eye.
-
Preparing the Soil: Ginger prefers loose, well-draining soil that is rich in organic matter. Prepare a pot or container with drainage holes and fill it with a well-draining potting mix or a blend of compost, sand, and loam.
-
Planting Ginger: Place the ginger rhizome sections in the prepared soil, ensuring the buds or eyes face up. Plant them about 1-2 inches deep, allowing sufficient space between each section. Water the soil thoroughly after planting.
-
Providing Warmth and Moisture: Ginger thrives in warm and humid conditions, so it is crucial to provide a warm environment. Place the pot or container in a location that receives indirect sunlight and has a temperature of around 75-85°F (24-29°C). Keep the soil consistently moist but not waterlogged.
-
Harvesting Ginger: Ginger is typically ready for harvest 8-10 months after planting. Lift the entire plant from the soil, gently removing the rhizomes. Break off the desired portion of the rhizome, leaving the rest in the soil to continue growing.
By following these steps, you can successfully grow your own ginger and enjoy its aromatic flavor and numerous health benefits.
Turmeric
Turmeric, the golden spice often associated with Indian cuisine, is also a potent medicinal herb. Curcumin, the active compound in turmeric, has been extensively studied for its many health benefits.
Benefits of Turmeric
-
Anti-Inflammatory Properties: Turmeric contains curcumin, a natural anti-inflammatory compound known for its ability to reduce chronic inflammation in the body. It may alleviate symptoms of conditions such as arthritis, asthma, and inflammatory bowel disease.
-
Boosting Brain Health: Curcumin has shown potential in enhancing brain health and reducing the risk of neurodegenerative diseases like Alzheimer’s. It can help improve memory and reduce cognitive decline, promoting overall brain function.
-
Supporting Heart Health: Turmeric has been associated with cardiovascular benefits. Curcumin may improve endothelial function, reduce cholesterol levels, and lower the risk of heart disease. It also has antioxidant properties that protect the heart from oxidative stress.
-
Aiding Digestion: Turmeric stimulates the release of bile from the gallbladder, aiding in the digestion of fats. It can help reduce symptoms of indigestion, bloating, and gastrointestinal disorders.
-
Supporting Liver Health: Curcumin has been shown to protect the liver from damage caused by toxins and certain medications. It may also support liver detoxification processes, promoting optimal liver health.
How to Grow Turmeric
Growing turmeric is a rewarding endeavor that allows you to enjoy the freshness of this golden spice. Follow these steps to grow your own turmeric plants:
-
Selecting Turmeric Rhizomes: Purchase fresh turmeric rhizomes from a reputable source or local garden center. Choose rhizomes that are plump, firm, and have several buds or eyes.
-
Preparing the Rhizomes: Soak the turmeric rhizomes in water overnight to encourage sprouting. Ensure each rhizome has at least two or three buds.
-
Preparing the Soil: Turmeric prefers well-draining soil enriched with organic matter. Amend the soil with compost or well-rotted manure to improve its fertility and drainage.
-
Planting Turmeric: Plant turmeric rhizomes 2-3 inches deep and space them approximately 6-8 inches apart. Ensure the buds or eyes face up and cover them with soil. Water the soil thoroughly after planting.
-
Providing Warmth and Moisture: Turmeric thrives in warm and humid conditions. Place your turmeric plants in a location that receives ample indirect sunlight and has a temperature consistently above 68°F (20°C). Keep the soil moist but not waterlogged.
-
Harvesting Turmeric: Turmeric is typically ready for harvest 8-10 months after planting. To harvest, carefully dig up the entire plant, loosen the soil, and gently remove the rhizomes. Store the harvested rhizomes in a cool, dry place.
By following these steps, you can successfully grow your own turmeric and enjoy its vibrant color and numerous health benefits.
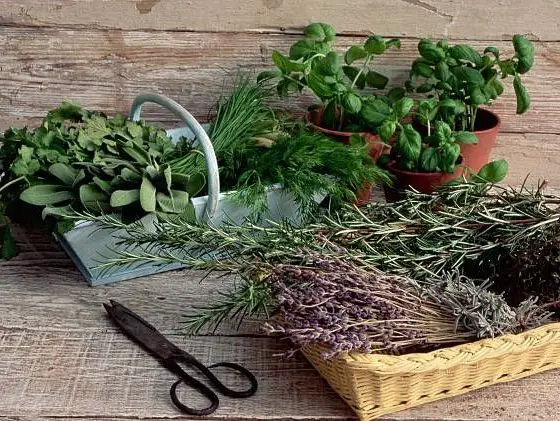
Calendula
Calendula, also known as pot marigold, is a beautiful and vibrant flower with exceptional healing properties. Its cheerful blooms and versatility make it a valuable plant for both medicinal and cosmetic purposes.
Benefits of Calendula
-
Wound Healing: Calendula has been traditionally used to promote wound healing and soothe skin irritations. Its anti-inflammatory and antimicrobial properties can help reduce inflammation, prevent infections, and accelerate the healing process.
-
Relieving Skin Conditions: Calendula can provide relief for various skin conditions, including eczema, dermatitis, and rashes. Its soothing properties can help alleviate itching, redness, and dryness associated with these conditions.
-
Soothing Sunburns: The cooling and anti-inflammatory properties of calendula make it an excellent natural remedy for sunburns. Applying calendula-infused oil or creams to sunburnt skin can provide relief and promote healing.
-
Reducing Inflammation: Calendula contains compounds that help reduce inflammation in the body. It can be used internally as a tea or externally as a topical treatment to alleviate inflammation associated with arthritis or other inflammatory conditions.
-
Promoting Oral Health: Calendula mouthwashes or gargles can help soothe mouth ulcers, sore throats, and gum inflammation. The antimicrobial properties of calendula can help prevent oral infections and improve overall oral health.
How to Grow Calendula
Growing calendula is relatively easy, and its cheerful flowers will brighten up any garden or patio. Follow these steps to grow your own calendula plants:
-
Choosing the Right Location: Calendula thrives in full sun to partial shade. Select a location that receives at least 4-6 hours of direct sunlight daily. Calendula also tolerates different soil types.
-
Preparing the Soil: Calendula prefers well-drained soil that is rich in organic matter. Before planting, loosen the soil and amend it with compost or well-rotted manure to improve its fertility and drainage.
-
Planting Calendula: Calendula can be grown from seeds, and direct sowing is the easiest method. Plant the seeds about 1/4 inch deep and 6-12 inches apart. Water the soil gently after planting.
-
Watering and Maintenance: Calendula requires regular watering to keep the soil moist but not waterlogged. During hot and dry periods, provide additional irrigation. Deadhead spent flowers to promote continuous blooming.
-
Harvesting Calendula: Harvest calendula flowers when they are fully open and vibrant. For medicinal purposes, pick the flowers early in the day after the dew has dried. Dry the harvested flowers in a well-ventilated area away from direct sunlight.
By following these steps, you can successfully grow your own calendula plants and harness their healing properties for various uses.
Eucalyptus
Eucalyptus, known for its refreshing aroma and medicinal properties, is a valuable plant to have in your garden. From respiratory health to relaxation, eucalyptus offers a range of benefits.
Benefits of Eucalyptus
-
Clearing Congestion: Eucalyptus leaves contain volatile oils that can help clear congestion and relieve the symptoms of respiratory ailments like colds, coughs, and sinusitis. Inhaling eucalyptus steam or using eucalyptus oil in a diffuser can provide relief.
-
Soothing Sore Throat: The antiseptic properties of eucalyptus can help soothe a sore throat. Prepare an herbal tea by steeping eucalyptus leaves in hot water, or gargle with eucalyptus-infused water for relief.
-
Promoting Relaxation: Eucalyptus has a calming effect on the mind and body. Its refreshing scent can help alleviate stress and anxiety, promoting a sense of relaxation and tranquility.
-
Repelling Insects: Eucalyptus oil is a natural insect repellent that can effectively ward off mosquitoes, flies, and other pests. Use eucalyptus oil in a diffuser, or apply it topically diluted with a carrier oil for added protection.
-
Supporting Dental Health: Eucalyptus has antimicrobial properties that can help combat bacteria responsible for dental issues such as tooth decay and gum disease. Using eucalyptus mouthwash or chewing eucalyptus leaves can promote oral health.
How to Grow Eucalyptus
Growing eucalyptus requires relatively specific conditions, but with proper care, you can enjoy the benefits of this fragrant plant. Follow these steps to grow your own eucalyptus:
-
Choosing the Right Eucalyptus Species: There are numerous eucalyptus species available, so select one that suits your climate and garden space. Some species are more cold-tolerant, while others thrive in warmer regions.
-
Preparing the Soil: Eucalyptus prefers well-drained soil with a slightly acidic to neutral pH. Before planting, improve the soil’s drainage by adding organic matter like compost or aged manure.
-
Planting Eucalyptus: Eucalyptus can be grown from seeds or cuttings. Plant seeds in individual pots, as they have a high germination rate. Germinate the seeds indoors before transplanting them outdoors after the last frost. Alternatively, plant eucalyptus cuttings directly in well-draining soil.
-
Providing Sunlight and Water: Eucalyptus thrives in full sun and requires abundant sunlight to grow properly. Water your eucalyptus plants regularly, especially during dry periods. However, avoid overwatering, as eucalyptus prefers slightly dry soil.
-
Pruning and Maintenance: Eucalyptus can grow rapidly, so pruning is necessary to maintain its shape and encourage bushier growth. Prune during the warmer months, removing dead or damaged branches and shaping the plant as desired.
By following these steps, you can successfully grow your own eucalyptus and enjoy its refreshing scent and myriad of health benefits.
In conclusion, these ten plants – aloe vera, peppermint, chamomile, echinacea, lavender, garlic, ginger, turmeric, calendula, and eucalyptus – offer a wealth of natural healing properties. From soothing sunburns to boosting the immune system, each plant serves a unique purpose in promoting your health and wellbeing. By learning how to grow these plants, you can harness their incredible benefits right at home. Whether you prefer to have a flourishing garden or a few potted plants on your windowsill, discover the power of nature’s medicine with these versatile and beneficial plants.
