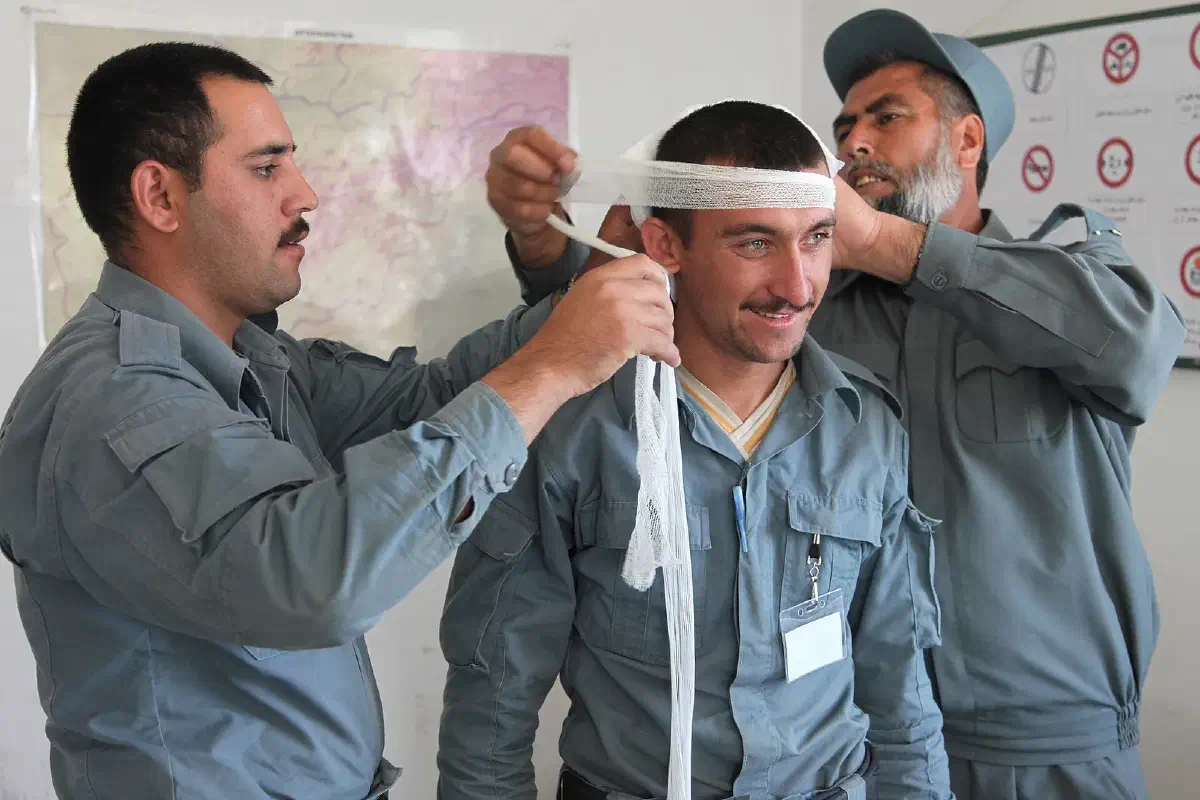
If an ambulance cannot reach you, the person who helps is whoever happens to be standing there. After a storm, an earthquake or a long grid failure, that could be you, and the first ten minutes often decide how an injury turns out. First aid is the one prepping skill that weighs nothing, never expires and works with or without a stocked kit.
This article lays out the skills in the order you will need them: sizing up the scene, keeping someone breathing, stopping bleeding, then the common injuries and emergencies, then supplies and the less obvious skills (triage, infection control, even childbirth). It is a primer, not a substitute for a hands-on course. Read it, then go and practice.
Start by sizing up the scene #
Staying calm is a skill. Panic clouds judgment, so take a breath before you touch anyone. Look at the surroundings for fire, falling objects, hazardous materials or anything else that could hurt you too. Your safety comes first, because you are no use to anyone if you become the second casualty.
Once the scene is safe, check whether the person is responsive and breathing, and call for emergency help if you can. Then decide what you are dealing with. A minor cut, a broken bone and cardiac arrest call for very different responses, and a few seconds of assessment point you toward the right one.
Basic life support #
CPR. If someone is unresponsive and not breathing, begin CPR immediately. Place the person on a firm, flat surface, kneel beside them, interlock your hands on the center of the chest and push down hard and fast at a rate of 100 to 120 compressions per minute, with rescue breaths in between. Keep going until help arrives or the person starts breathing on their own.
AED. If an automated external defibrillator is available, attach the pads to the bare chest as shown in the diagram on the device and follow its voice or visual prompts. Make sure nobody is touching the person before a shock is delivered.
Choking. If someone cannot breathe or speak, stand behind them and wrap your arms around the waist. Make a fist with the thumb side against the upper abdomen, just above the navel, grasp it with your other hand and give quick upward thrusts until the object comes out.
Heart attack and stroke. Learn the signs. Chest pain or discomfort, shortness of breath, nausea, cold sweats and pain spreading to the arm, jaw or back point to a heart attack. Sudden weakness or numbness on one side of the body, trouble speaking, a severe headache and loss of balance suggest a stroke. If the person is conscious and able to swallow and has no allergy or condition that rules it out, one adult-strength aspirin (325 mg) to chew may help prevent blood clotting from making a heart attack worse. If they stop breathing, begin CPR.
Control bleeding #
Heavy bleeding can kill faster than almost anything else, so deal with it early. Apply direct pressure with a sterile cloth, or your hand if you have nothing else. Elevate the limb if possible and add a pressure bandage. For severe bleeding that will not stop, a tourniquet is the next step. Whatever you do, stay calm and focused while you work on the injured person.
Wound care #
A wound that is cleaned properly is far less likely to become infected.
- Wash your hands and put on gloves if you have them.
- Rinse the wound with clean water or saline to flush out dirt and debris. Remove any visible foreign objects with a clean cloth or sterile tweezers, but do not scrub, since that can cause further damage.
- Skip hydrogen peroxide and alcohol on the wound itself, which may damage healthy tissue. Pat dry with sterile gauze.
- Apply an antiseptic ointment if you have it and cover the wound with a sterile dressing that covers the entire area. Make sure it is snug but not so tight that it restricts circulation.
- Change the dressing regularly with clean hands, removing the old one gently so you do not disturb healing tissue.
Infection watch. Look for increasing redness, swelling, warmth, drainage, a fever or worsening pain. Do not pick at scabs and do not touch the wound with dirty hands. If you notice redness, swelling or pus, get professional help promptly.
Suturing. Some sources teach stitching minor wounds when no medical help is available. It needs sterile gloves and instruments, a cleaned wound and approximated edges, and it should only be attempted by someone with proper training. Without training, a good dressing is the safer choice.
Cuts and lacerations. Clean with mild soap and water, apply pressure to stop bleeding, elevate the limb and cover with a sterile adhesive bandage. If the cut is deep or the bleeding does not stop, it needs professional evaluation and possibly stitches.
Burns #
Judge the severity first. First-degree burns affect only the top layer of skin and appear red and painful. Second-degree burns reach the second layer and may blister. Third-degree burns go deeper and can look white or blackened.
For minor burns, stop contact with the heat source and hold the burn under cool, not cold, running water for at least 10 minutes and up to 20. Do not use ice or ice water, and do not put butter on it. Cover the burn with a clean non-stick dressing or cling film, change the dressing regularly and watch for infection: more pain, redness, swelling or discharge.
Seek medical attention for severe burns, for burns that cover a large area, and for any burn on the face, hands, feet or genitals. In the meantime, cover the area with clean non-stick material and elevate it if you can.
Sprains, strains and fractures #
For sprains, use R.I.C.E.: rest the limb, apply ice to reduce swelling, use a compression bandage for support and elevate it above heart level. If pain and swelling persist or the person cannot bear weight, get it checked.
For fractures, learn to tell the types apart. In an open fracture the bone breaks through the skin, in a closed fracture it does not, and in a displaced fracture the ends of the bone are not aligned. Check the area for open wounds or dislocations first. Then immobilize the limb with a rigid splint such as a rolled magazine, a piece of cardboard, a wooden board or a commercial splint, placed along the injured bone. Do not attempt to realign or manipulate the bone. Traction, pulling on the limb to line up the bone ends, is best left to professionals. Splint the limb the way you found it and get help.
Shock #
Shock can follow severe bleeding, burns, trauma or an allergic reaction. The signs are pale or clammy skin, rapid and shallow breathing, a weak and rapid pulse, confusion and fainting. Lay the person flat on their back, raise the legs about 12 inches, cover them with a blanket to keep them warm and call for help. Do not give them anything to eat or drink if they are in poor condition. If help is truly out of reach and the person is conscious and able to swallow, small sips of clear fluids such as water or an isotonic sports drink can help replace what has been lost.
Allergic reactions #
Reactions run from itching and hives to anaphylaxis. Watch for swelling of the face or throat, difficulty breathing and a rapid heartbeat. For mild to moderate reactions, an oral antihistamine such as diphenhydramine (Benadryl) helps with itching, hives and minor swelling, dosed according to age and weight. For severe reactions, epinephrine is the primary treatment: if the person carries an auto-injector such as an EpiPen, help them use it and call emergency services immediately. Keep monitoring them afterward, because symptoms can come back. If their breathing is compromised or they deteriorate, be ready to begin CPR.
Heatstroke and hypothermia #
Heat stroke is the most severe heat illness. Look for high body temperature, hot and dry skin, a strong rapid pulse, confusion, unconsciousness or seizures. Heat exhaustion looks like heavy sweating, weakness, dizziness, nausea, headache and pale skin. In either case, move the person to shade or a cool place, remove excess clothing, cool the skin with wet towels or water, and create airflow with a fan or by hand to help evaporation. Cool fluids help if the person is conscious. Watch their vital signs and seek medical help if symptoms worsen.
Hypothermia sets in when the body loses heat faster than it can produce it. Insulate the person with blankets or warm clothing and rewarm gradually, which prevents shock and other complications. Get medical evaluation as soon as possible.
Diabetic emergencies and breathing trouble #
Low blood sugar shows up as weakness, confusion, dizziness, sweating or trembling. Give a fast-acting carbohydrate such as fruit juice, regular soda or glucose gel and keep watching the person.
Respiratory distress can come from asthma, choking or near-drowning. Keep the person calm, help them into a comfortable position, assist with a prescribed inhaler if they have one, and monitor breathing until help arrives.
Injuries after a disaster #
Disasters create their own injury patterns. After an earthquake, make sure you are safe and then look for life-threatening problems first: severe bleeding, a blocked airway and fractures. Clothing can work as a makeshift splint. After floods or hurricanes, avoid floodwater and debris, evaluate breathing difficulties and major bleeding first, and clean and dress wounds. After a tornado, expect cuts, fractures and head trauma, and control bleeding with direct pressure and elevation, watching out for hazards like unstable structures.
Triage and calling for help #
When several people are hurt, triage lets you spend limited time where it helps most. The Simple Triage and Rapid Treatment (START) method sorts patients into immediate, delayed, minimal and expectant categories. Look first for life-threatening problems like airway obstruction and severe bleeding.
Learn to take vital signs: heart rate, blood pressure, respiratory rate and temperature, along with a head-to-toe check for pain, swelling or tenderness. When you call for help, state the nature of the emergency, the exact location, how many people are involved and any ongoing dangers, and follow the dispatcher’s instructions. If phones are down, two-way radios are the alternative, and clear, short messages matter more than technical language.
Medications, supplies and infection control #
Keep a stock of the over-the-counter medications you use, plus any prescriptions you depend on, and rotate them so they do not expire. Learn the dosages, the interactions and the right storage for each. Give medication only if you are trained or following a professional’s advice, and only when professional help is not available.
A kit should hold adhesive bandages, sterile gauze pads, adhesive tape, antiseptic wipes or solution, scissors, tweezers, disposable gloves, a CPR mask, a thermometer, pain relievers and antihistamines. Add a blood pressure cuff, stethoscope, splints, skin adhesive or sutures and a printed medical reference guide as your skills grow. Check the kit on a schedule. Medications expire and supplies get damaged.
Infection control protects you and the patient. Wash hands for at least 20 seconds, or use a sanitizer with at least 60 percent alcohol if there is no water. Wear gloves, masks or goggles when the situation calls for them, use alcohol-based solutions on skin and bleach solutions on surfaces, and dispose of contaminated bandages and gloves in a sealed bag.
Emergency childbirth #
Labor does not wait for a hospital. Signs include regular contractions, lower back pain, a sudden gush of fluid or a visible head. If the mother cannot reach a medical facility in time, stay calm, reassure her and prepare a clean, comfortable space with clean towels, sterile gloves, sterile scissors or clamps and a warm blanket. When the head emerges, support it and guide it gently downward as she pushes. Clear the baby’s airway, dry the baby and place it skin-to-skin with the mother. If the cord is around the neck, gently slip it over the head. Watch for heavy bleeding, and if the baby is limp or not breathing, respond quickly. Encourage breastfeeding when the baby shows signs of readiness.
Psychological first aid #
People in crisis need emotional support too. Look for anxiety, fear, confusion or withdrawal, listen without judgment, and tell them that strong reactions are natural. Encourage professional help when needed, and keep checking in.
Know when to stop #
Most common injuries can be managed with good first aid. But a deep cut, a suspected fracture or a head injury calls for professional care, and so does any situation where you feel overwhelmed. Trust your instinct. Practice these skills regularly, preferably in a certified course, so that on the worst day your hands already know what to do.