Cooking with sunlight costs nothing per meal and needs no fuel, no wiring, and no smoke. It also asks something in return: sun, patience, and a willingness to plan dinner around the sky. Four basic designs cover almost everything people do with solar heat, and one of them, the box oven, can be built from a cardboard carton in an afternoon. This guide covers all four, walks through that build, and then deals with the practical side: what goes wrong, how to cook well, and what to put in the pot.
The four basic solar cookers #
Box cookers #
A box cooker is the solar oven most people picture. It is an insulated box with a transparent lid. Sunlight comes in through the lid, hits a blackened interior, turns into heat, and stays there. Commercial and homemade versions use cardboard, aluminum foil, or other reflective surfaces for the walls, with an insulated outer shell and a black inner box that soaks up light. The lid is glass or plastic.
To use one, put the food in a pot or tray inside, close the lid so no heat leaks, and set the box in full sun, angled toward it. Adjust the angle as the sun moves.
The strengths are real. Box cookers are cheap to build or buy, they hold more than the other types, and they handle stews, soups, and baked goods. They are also the slowest of the four and the most dependent on clear weather. A cloudy afternoon gives inconsistent results. Cooking times run long, but a box cooker forgives you for leaving it alone, which is why slow-cooked dishes suit it. On a sunny day, a box cooker can reach about 300°F, hot enough for casseroles and slow-cooked stews.
Panel cookers #
Panel cookers, sometimes called box-in-a-bag cookers, bounce sunlight at a pot with reflective panels instead of enclosing it in a box. The panels are usually aluminum-coated polyester or cardboard covered in aluminum foil, and the pot sits inside a plastic bag or fabric enclosure that traps the heat.
They fold flat, weigh almost nothing, and cost less than the other designs, so they are the natural choice for camping, picnics, or a bug-out bag. They reach cooking temperature quickly. The trade-offs: a smaller capacity than a box cooker, poor performance in cold or windy weather because holding heat is hard, and a temperature ceiling too low for real baking or roasting.
Parabolic cookers #
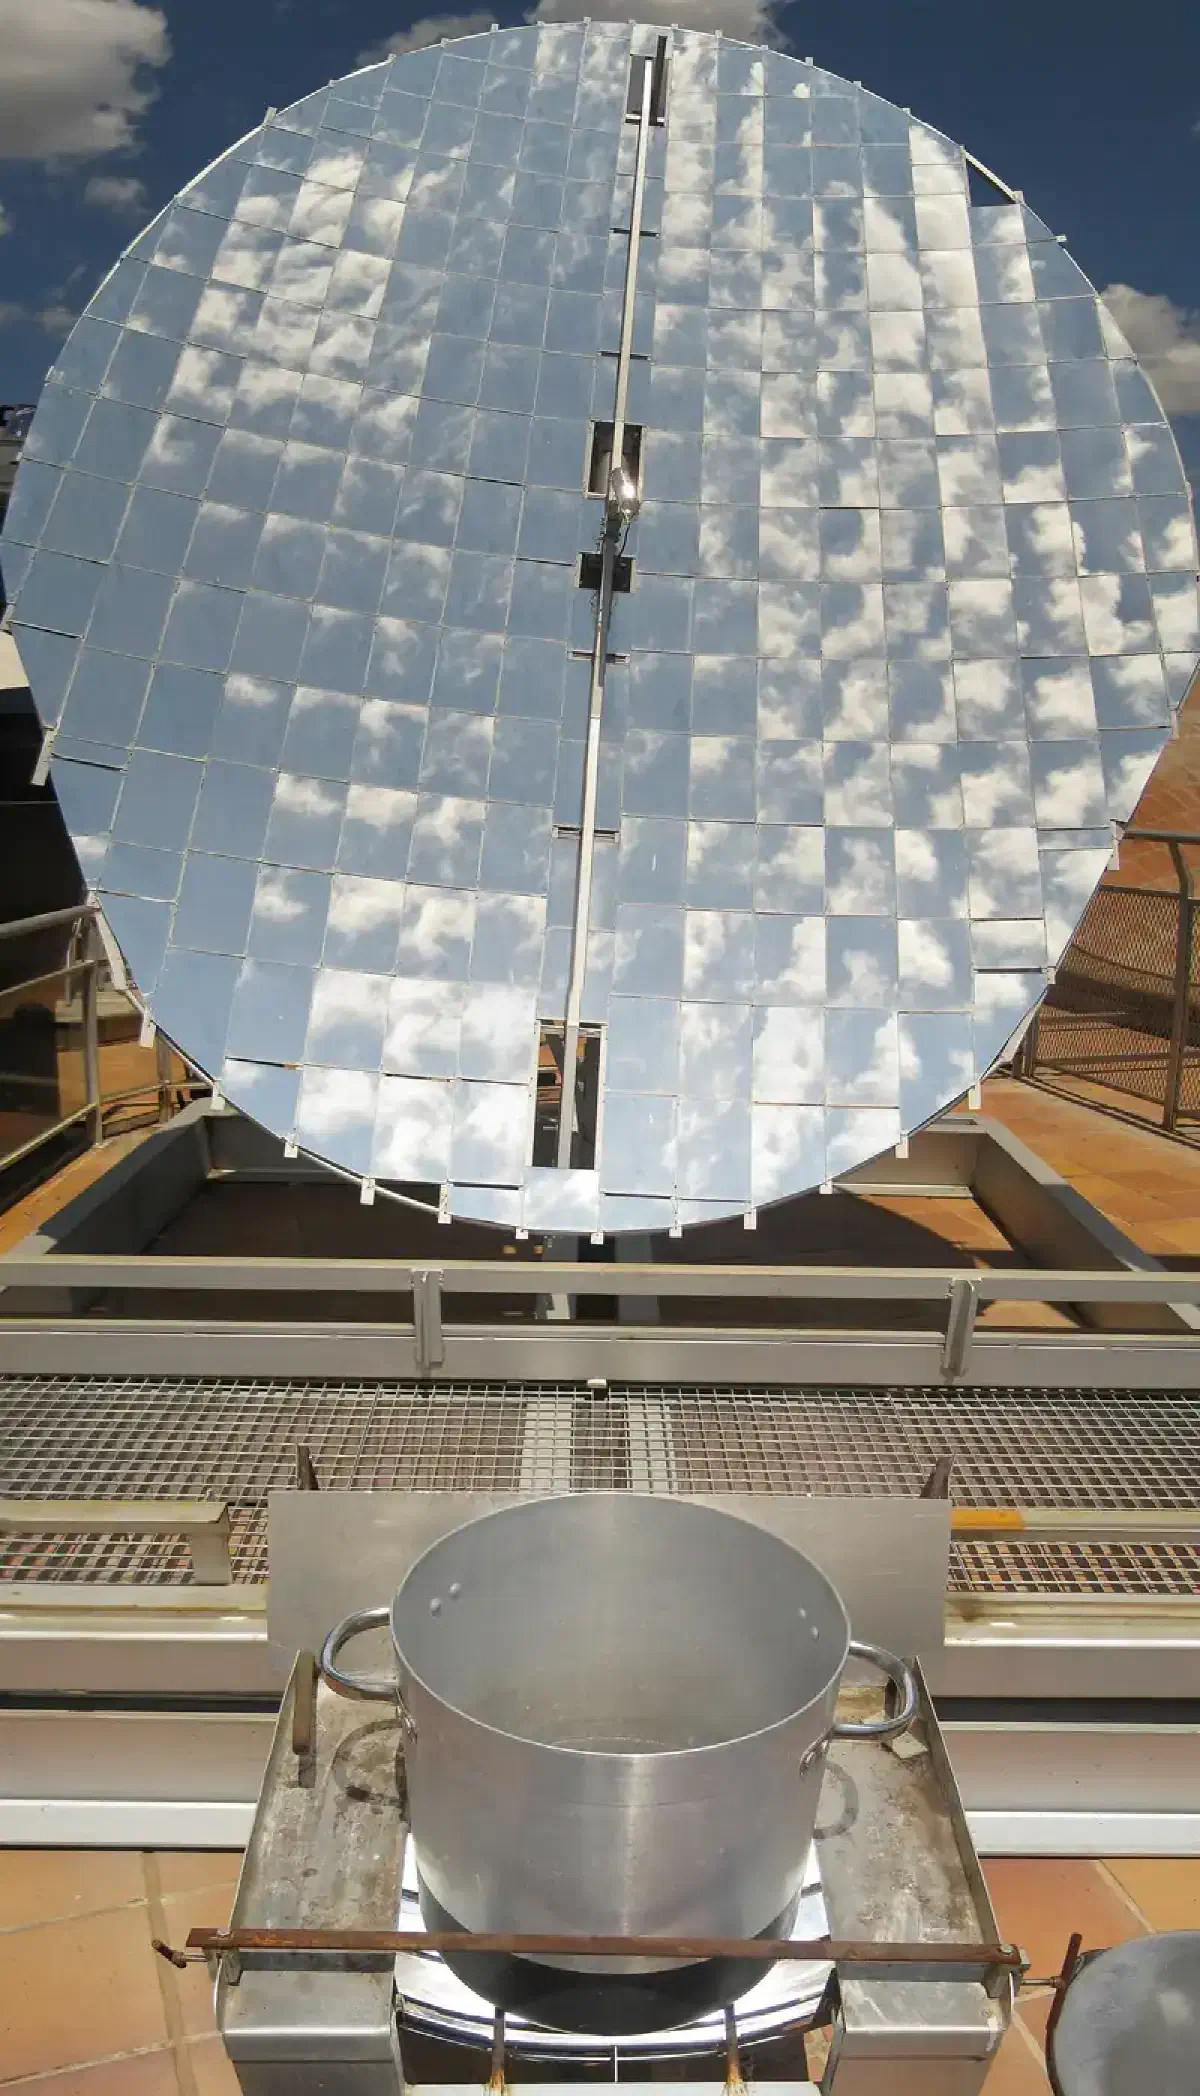
A parabolic cooker, or solar dish, uses a curved mirror-like reflector to concentrate sunlight onto one focal point. The pot sits at that point and heats fast. These cookers can reach the temperatures of a stovetop burner, which makes them the only solar option that boils, fries, and grills with any speed.
That power comes with a price. You have to aim the dish carefully and keep re-aiming it as the sun moves, so it needs more attention than any other design. It is generally more expensive and harder to build. And concentrated sunlight can burn skin and scorch material, so treat the focal point like a flame. For cooking that needs high heat in a hurry, a parabolic cooker is still the best choice.
Solar kettles #
A solar kettle is built to heat water for tea, coffee, or any other hot drink. It is an insulated glass container surrounded by a reflective surface that directs light onto the water. Some models add a thermometer or temperature control. Fill it, set it in direct sun, aim the reflector, and the water slowly comes to a boil.
Kettles do one job. They suit camping and hiking, where fuel and electricity are scarce, and they release no emissions. But they can’t cook a meal, they struggle on overcast days, and their small size means you boil a little water at a time.
Building a solar oven from a box #
The oven in this section is a variation of the box cooker above. It uses materials most households can find.
Materials and tools #
- A box. Cardboard works, as does wood. It must be sturdy enough to sit outdoors and deep enough for the pot you plan to use. Think about the size of what you will cook before choosing.
- Insulation. Foam board, fiberglass, or recycled material such as old newspaper or straw. Look for a high R-value, which means the material resists heat flow well.
- Aluminum foil. Heavy-duty foil lasts longer and reflects better. Buy enough to cover the whole interior and the lid.
- A thermometer that tolerates high temperatures and has clear markings. You need it to know when the oven has reached cooking temperature.
- A glass pane, thick and durable, large enough to cover the opening of the box completely.
- Tools: a box cutter or utility knife, scissors for the foil, a ruler or tape measure, and a glue gun or strong adhesive.
Assembly #
Start by preparing the box. Remove loose flaps and unwanted openings, then trim it down so only the sides you need remain. A sturdy shape prevents heat loss later.
Next, insulate. Cut the insulation to fit the interior walls, the bottom, and the lid, and glue each piece down with no gaps. Gaps are where heat escapes.
Line the whole interior, lid included, with aluminum foil. Smooth out every crease and wrinkle, because a flat surface reflects sunlight into the oven instead of scattering it.
Finally, set the glass pane over the opening. Line it up with the edges and fasten it with adhesive or fasteners. Seal any gap around the glass, since that seam is the easiest place for heat to leak out.
Using the oven #
Choose a flat, open spot that gets sun all day, away from trees or buildings that will throw shadows. Face the oven toward the midday sun, with the glass angled toward the sun’s path, and nudge it periodically as the sun moves.
Preheat before you cook. Leave the empty oven in direct sunlight for 30 minutes to an hour, depending on how strong the sun is, and watch the thermometer until it reaches the range your recipe needs. Then put in food in a container that can take the heat, close the lid firmly, and check on it from time to time. Cooking times differ from a conventional oven, so use a timer to avoid overcooking.
Why bother: the benefits #
Solar cooking has an obvious environmental case. It burns no gas and uses no electricity, so it adds no greenhouse gases, and where it replaces firewood or charcoal it eases pressure on forests. The energy is free and arrives without conversion or transport losses.
The health case is just as strong. Wood and charcoal fires release smoke and indoor air pollutants. Solar cookers produce none, which matters most in communities where indoor air pollution is a major problem. Cleaner air means fewer respiratory illnesses and a safer cooking space.
For preppers the argument is simpler still. As long as the sun shines, you can cook, and a simple cooker can be made from locally available materials without expensive or imported equipment.
Common challenges #
Weather. Cloud and overcast cut performance, lengthening cook times or leaving food undercooked. Pick the right cooker for your climate and plan around clear stretches.
Capacity. Smaller and portable models cannot hold big pots or feed a crowd. Use several cookers at once, or adjust quantities and timing to fit.
Time. Solar heat builds gradually, so meals take longer than on a stove. Positioning the cooker well and choosing suitable techniques, such as slow cooking or soaking ingredients beforehand, make up much of the difference.
Cost and availability. Good cookers can be pricey or hard to find in some regions, and local markets may offer little choice. Homemade designs sidestep this, which is one reason the DIY route is worth learning.
Cultural acceptance. In some communities, traditional cooking carries social value and solar cookers meet skepticism. Demonstrations that show a solar cooker preparing familiar, culturally relevant dishes tend to persuade better than argument.
Tips for cooking well #
- Pick a sunny spot. Avoid shade from buildings and trees.
- Use dark, matte cookware. Dark pots, especially black ones, absorb more sunlight and heat faster. A clear glass or plastic lid over the pot traps heat and keeps moisture in, which also improves flavor.
- Preheat the cooker by leaving it in the sun for a few minutes before the food goes in.
- Track the sun. Re-angle the cooker through the day to keep sunlight on it.
- Check temperature. Solar cooking runs lower than a stovetop or oven, so use a cooking thermometer and make sure meat reaches the recommended internal temperature to avoid foodborne illness.
- Plan ahead. Allow enough time, especially in a box cooker, and decide what you’ll eat based on the sunlight you expect.
Experiment too. Try different dishes and techniques; a solar cooker rewards practice.
Hybrid and portable options #
Some newer designs are worth knowing about. Portable solar ovens are compact and lightweight, built around a reflective panel or a parabolic dish that focuses light on a cooking chamber, and they get hot enough to bake, roast, or simmer. They suit camping, hiking, or bugging out. Hybrid solar-electric cookers combine solar heating with an electric element, so you can finish a meal when the sun fades. Improved reflective materials, better heat-trapping designs, and temperature controls continue to raise efficiency.
Recipes that work in a solar cooker #
Preheat the cooker in direct sun before every recipe below.
Solar-baked bread #
Combine 3 cups all-purpose flour, 1¼ cups warm water, 1½ teaspoons salt, and 1½ teaspoons instant yeast. Knead on a floured surface for about 5 minutes until smooth and elastic. Let the dough rise in a greased, covered bowl in a warm place for 1 to 2 hours, until doubled. Shape it into a loaf, put it in a greased and floured pan, cover, and let it rise another 30 to 45 minutes. Bake in the preheated cooker for roughly 1 to 2 hours, until golden and hollow-sounding when tapped on the bottom. Cool before slicing.
Sun-brewed iced tea #
Put 4 to 6 tea bags (black, green, or herbal) in a jar with 4 cups of water, fully submerged, and leave it in direct sun, ideally inside the cooker, for 4 to 6 hours depending on how strong you like it. Remove the bags, sweeten if you want, add lemon or mint, and pour over ice.
Roasted vegetables #
Chop potatoes, carrots, bell peppers, zucchini, or whatever you have into bite-size pieces, toss with olive oil, salt, pepper, and herbs, and put them in a baking dish suitable for solar cooking. Cook 1 to 2 hours, until tender and golden.
Rice pilaf #
Sauté a finely chopped small onion and 2 minced garlic cloves in 2 tablespoons olive oil in the cooker until soft. Add 1 cup long-grain rice and stir to coat, then pour in 1¾ cups vegetable or chicken broth with ¼ teaspoon each of cumin and coriander, plus salt and pepper. Cover and cook 1 to 2 hours until the grains are tender. Fluff with a fork and garnish with parsley.
Sun-dried fruit #
Slice fruit thin and even, lay it in a single layer on a tray, and let it dry in the preheated cooker for 4 to 8 hours, flipping now and then. It is done when slightly leathery. Cool completely and store in an airtight container.
Where solar cooking is going #
A number of organizations promote solar cooking, among them Solar Cookers International, Solar Cookers Without Borders, and Global Sun Oven. They supply training and resources, and plans for everything from simple box cookers to parabolic reflectors are widely available for anyone who wants to build their own. Competitions bring cooks together to share techniques and prepare varied dishes. In developing countries, solar cooking reduces the burden of gathering fuel and the health risks of smoke, and programs there often train local people to manufacture and distribute cookers.
Solar cooking will not replace a stove in every situation. As a second cooking method that needs no fuel, though, it is hard to beat, and once you have built and used a simple oven you will know how much planning your local sun requires.
Related reading: Building An Efficient Off-Grid Cooking System and How To Safely Use Alternative Cooking Sources In An Emergency. This article is part of the self-reliance section.