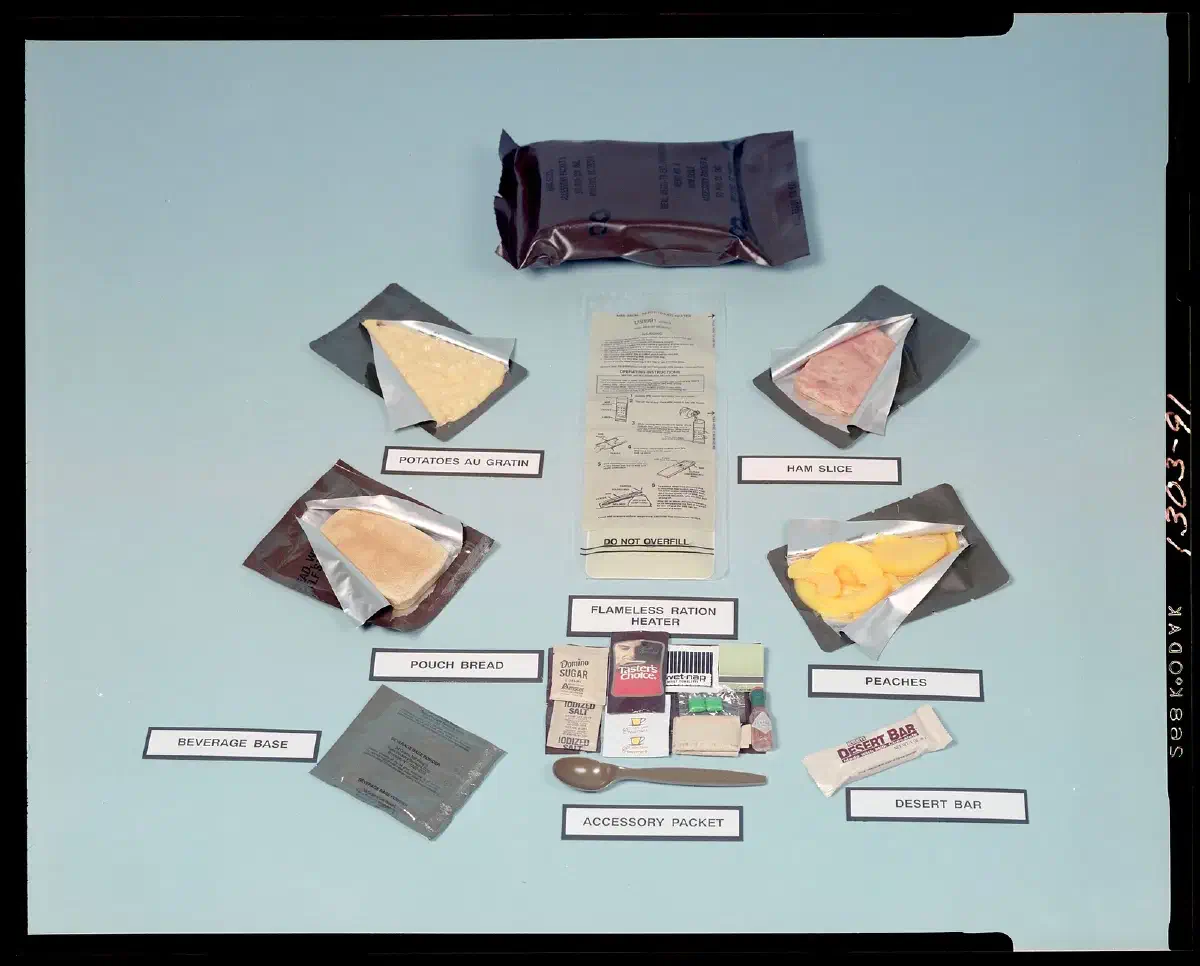
Meals Ready to Eat have fed soldiers for decades, and the survival world has adopted them for good reason: a sealed pouch with a full meal inside, no cooking required. The trouble is price. Store-bought MREs are expensive, and plenty of people will tell you they don’t taste all that good either. When the food shortages of the COVID-19 pandemic caught a lot of households short, making your own started to look like the obvious answer.
Homemade MREs cost less, you pick the flavors, and you control what goes in. They also teach you a skill that matters if buying them stops being an option. There are two ways to build them. One uses dehydrated and freeze-dried ingredients sealed in Mylar for very long storage. The other assembles shelf-stable grocery items into labeled meal packs. This guide covers both.
What a homemade MRE has to do #
Before you buy anything, settle three requirements.
Calories. If a crisis drags on, you may end up rationing down to one meal a day. A homemade MRE should therefore carry your full daily requirement, at least 1,200 calories, so a single pouch can keep you going. That means nutrient-dense, high-calorie food, not low-density filler.
Weight and bulk. These meals have to fit in a bug-out bag alongside everything else. A pouch that looks tidy on the shelf but eats half your pack is a bad design. Flat, vacuum-sealed packs stack and carry better than rigid boxes.
Shelf life. The shorter the shelf life, the more often you replace the food. A well-stocked pantry doesn’t help much if everything spoils within six months and you need to eat for two years. Choose ingredients and packaging that match the time frame you’re planning for.
Think about the whole meal, too. A breakfast pouch might include a single-serving packet of instant coffee. A main meal might include a powdered drink packet such as Gatorade. You can also add individual water pouches, which most survival suppliers sell.
Supplies #
Four pieces of equipment do most of the work in the long-storage method. Packaging is what separates a meal that lasts a season from one that lasts for years.
Dehydrator #
The dehydrator is the most important tool for homemade MREs, so shop around. Beyond size and price, look at heat distribution and airflow. Dehydration is a simple idea: hold food at a set temperature for a set time until the moisture is gone. The hard part is even heat. Some foods need to sit at a particular distance from the heat source, so you want a unit with good airflow. Read reviews and the manufacturer’s guidelines before you buy. A model like the COSORI Premium is a typical example of the type to look at.
Mylar bags #
Mylar has changed long-term food storage. Stored food is most vulnerable to heat, light, oxygen, moisture and rodents, and Mylar helps with every one of those. It isn’t a substitute for proper rigid containers such as storage buckets, but paired with a vacuum sealer it keeps homemade survival food safe for years.
Vacuum sealer #
Food goes bad because bacteria and other microorganisms get into it. Freezing is one answer, but it isn’t dependable in a survival situation. Commercial MREs are vacuum sealed instead, and yours should be too. Sealers are fairly cheap, and they pay for themselves in what you save on store-bought meals. You can also buy pre-vacuum-packed food and drop it into your own MRE.
Desiccant #
Silica gel, the little packets you find in a bag of jerky, absorbs moisture. A good packet can take up as much as 40% of its own weight. Tuck one into each pouch and the food stays fresher for longer.
Everything else #
For the grocery-assembly method you need much less: resealable plastic bags, vacuum bags or Mylar bags, labels, and optionally a flameless MRE heater. Heaters are activated with water and warm a meal without a stove or open flame. Camping stores, grocery stores and online retailers carry all of this. Labels can come from an office supply store, or you can use paper, tape and a permanent marker. Whatever bag you choose, make sure it’s durable and airtight to keep out moisture and contaminants.
Choosing ingredients #
Aim for balance. Each meal should have protein, carbohydrates, fats, vitamins and minerals. Lean proteins such as canned tuna, chicken or beef work well, and whole grains, fruit and vegetables add nutrients. Pick foods that are pre-cooked, dehydrated or canned, because they outlast fresh ingredients by a wide margin. And pick things you will actually eat. A meal you dislike doesn’t help you when you’re tired and under stress.
For the dehydrated approach, these hold up best.
Breakfast: dried rolled oats, dehydrated fruit such as bananas, apples or apricots, cinnamon, and milk powder.
Main meals: freeze-dried chicken, beef or pork, powdered potato, dehydrated vegetables, powdered eggs, couscous, and powdered tomato for soup.
Most commercial MREs can be eaten straight from the bag, but dehydrated meals need rehydration, and some meals need heat. Plan your water supply to match.
Assembling the meals #
- Prepare the ingredients. Open and drain canned items, portion snacks, and lay out everything for each meal.
- Package each meal. Put the food in a resealable bag, vacuum bag or Mylar bag. Seal it airtight. For long storage, vacuum seal first and add a desiccant.
- Label it. Write the contents and the date prepared on every pouch. You can’t manage shelf life if you can’t tell when a meal was made.
- Add heating instructions. If a meal includes canned soup or meat, note how to heat it, with an MRE heater or another method.
- Store it. Keep the finished meals somewhere cool, dry and out of direct sunlight, and check them regularly for moisture or damage.
Meal ideas #
Mix and match to suit your tastes and diet.
A breakfast pack might hold instant oatmeal, a dried fruit and nut mix, a protein bar, and instant coffee or tea.
A lunch pack could contain canned tuna or chicken, crackers or tortillas, nut butter or cheese spread, a granola bar, and a fruit cup or applesauce.
A dinner pack might combine canned soup or chili, instant rice or pasta, canned vegetables, jerky or sausage, and a cookie or some chocolate for dessert.
cheesy spaghetti #
Cheesy spaghetti is a staple in most households and it works well as an MRE. The pasta is full of energy and carbs, and the cheese adds protein. Both are bulky and calorie-dense, which is what you want.
You need MRE spaghetti with meat sauce and MRE cheese spread. Heat the two together in the same pot for ten minutes, then mix them in your main meal pouch and add sauce or seasoning as needed.
field birthday cake #
Being in the middle of a survival situation doesn’t mean a birthday goes unmarked. You need an MRE pound cake, MRE crackers, a pack of dairy creamer, a pack of sugar, a pack of cocoa mix, a canteen of water with a spoon, and matches.
Combine the cocoa, creamer and sugar with a little water in a clean canteen cup. Add more powder or water until the icing is as thick or thin as you like. Spread it over the pound cake, set the cake on a plate of crackers so nothing drips, and stick the matches in the top as emergency field candles.
Storage and shelf life #
Where you keep the meals matters as much as how you pack them. Choose a cool, dry spot away from direct sunlight and temperature swings. Skip basements and garages, where moisture and temperature extremes cut shelf life.
How long they last depends on the ingredients and storage conditions. In general, homemade MREs can last three to five years in good conditions. Meals built from dehydrated food, a vacuum seal, Mylar and a desiccant should do better than a pack of canned goods in a zip bag, but check the packaging and contents regularly either way.
Rotate your stock. Eat older meals first and replace them, and use the date on each label to keep track. Treat the meals as part of your working food supply and not as something to seal away and forget.
Where to start #
You don’t need to invest in everything at once. A vacuum sealer and a stack of Mylar bags will let you build your first batch from pre-dried ingredients. A dehydrator comes later, when you want to make your own. Even an assortment of shelf-stable foods in labeled bags beats having nothing ready. Meals you make at home will likely taste better and last longer than the ones you can buy, and you’ll know exactly what’s in them.
Related reading: Food and water guide; best civilian MRE reviews; dehydrating food for long-term storage; vacuum-sealed food safety