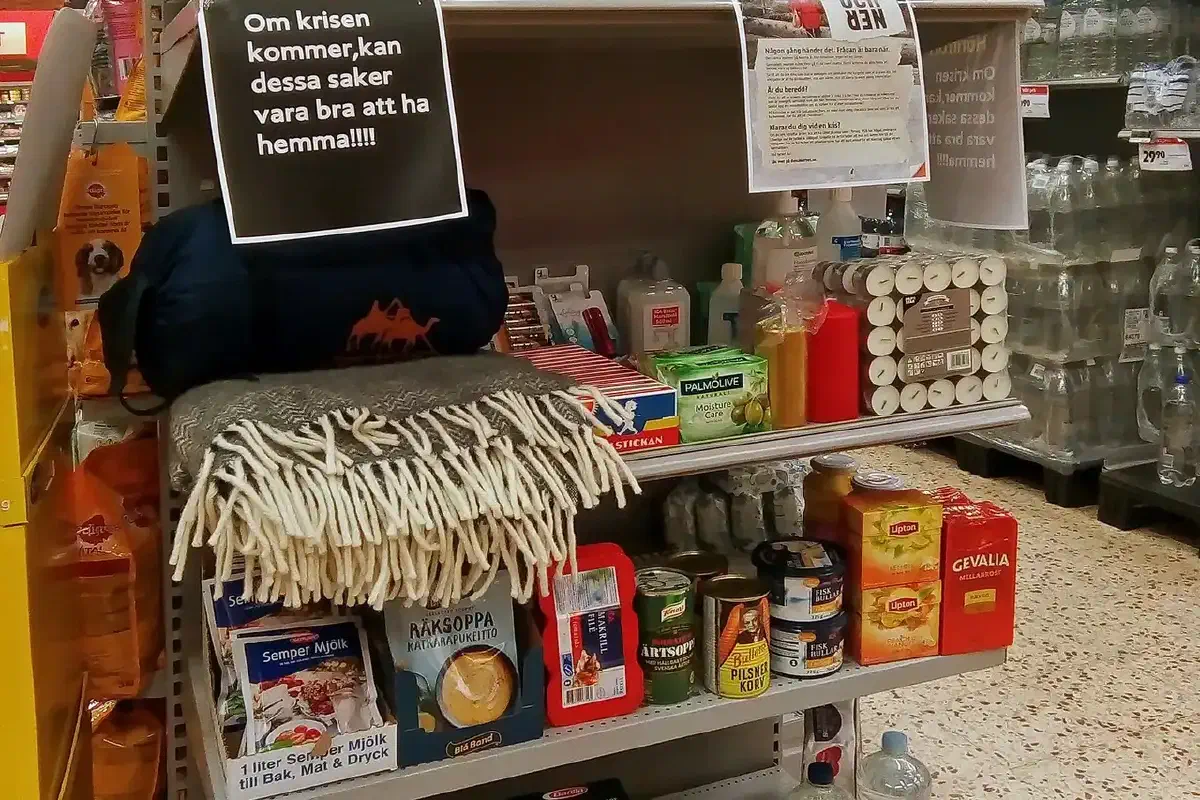
Prepping means getting ready for emergencies, disasters and anything else that could disrupt daily life, and doing it before they happen. It does not mean living in fear. Most people who prep are simply tired of hoping nothing goes wrong. Building a stockpile, learning a few survival skills and having a plan means you can look after yourself and the people you love when something does.
The hard part is the beginning. The topic is enormous, the advice is contradictory, and it is hard to know what comes first. This guide puts the first steps in a workable order, from taking stock of your situation through to the habits that keep you prepared for the long run.
Take stock of where you are #
Before you buy anything, look honestly at your current level of preparedness. How long could you manage without electricity, clean running water, or the ability to buy food? Write down the gaps. That list is your starting point.
Then work out what you are preparing for. Natural disasters such as hurricanes, earthquakes, floods, tornadoes and wildfires are the obvious candidates, but power outages and civil unrest belong on the list as well. Consider how likely each one is where you live and how much damage it would do, and put them in order. Geography does a lot of the work for you. An apartment in a city and a farmhouse in the country face different problems and need different answers.
Finally, look at your own household: how many people, their ages, any medical or dietary needs, and your pets. Those details shape what goes in your supplies far more than any generic list.
Learn the basics #
Read before you spend. Books and websites give you the ideas, and forums and blogs add the experience of other preppers. One concept worth knowing early is the Rule of Threes, which gives you a sense of priorities: you need to sort out the things that kill fastest first.
Learn the essential skills as well: first aid, fire-building, shelter, water purification and navigation. These help in a real emergency and make you more self-sufficient day to day. Courses and workshops are worth the money.
Find out how your area handles emergencies. Know your evacuation routes, where the nearest shelters are, how local alerts reach you, and whether any government or community programmes offer help. You will use these resources far better if you looked them up before the crisis.
Make a plan and a budget #
Decide what you want to achieve. For one household that might be a two-week supply of food and water. For another it is long-term self-sufficiency in food, water and energy. Your answer shapes everything that follows, so decide how much you want to rely on outside help and how much on your own abilities.
Set a budget you can live with. Prepping costs money, and it is not worth wrecking your finances to do it. Pick an amount you can comfortably put in each month, start with the essentials, and add to them as money allows. Preparedness and financial stability need to be in balance.
Then write the emergency plan. Cover the scenarios you listed, with evacuation procedures, communication arrangements, meeting points and who is responsible for what. Plan more than one route out of your home. For communication, decide who calls whom and where everybody meets if the family is separated. Make sure every member of the household knows the plan, and practise it.
Build up your supplies #
Start with food, water, medicines and a few basic tools. Pace yourself. It is better to start small and get it right than to buy a lot and be overwhelmed.
Food. Aim for at least a three-day supply to begin, then grow it. Concentrate on foods with a long shelf life: canned vegetables, fruit and meat, rice, pasta, dried beans, dried fruit and nuts, and granola bars. As a rough illustration of a starter shelf, think in terms of around 20 cans of assorted vegetables, fruit and meat, a box of granola bars, and a couple of bags of dried fruit, then grow the quantities to suit your household. Take dietary restrictions into account, and rotate what you store so it does not spoil.
Water. Plan on one gallon per person per day. Use food-grade containers and seal them well to prevent contamination. Add a way to purify water, such as a filter or purification tablets, in case the stored supply runs out.
Medication and first aid. If anyone in the household takes regular medication, make sure you have enough to cover an emergency, and keep a list with doses and instructions. Build a first aid kit with bandages in assorted sizes, antiseptic wipes, and pain relievers such as ibuprofen and acetaminophen. Check it regularly.
Shelter and clothing. You may have to stay put or leave in a hurry. Keep warm clothing, wool or thermal blankets (a starter figure of four is reasonable for a small household), and a couple of tarps. Flashlights and spare batteries, multi-purpose tools, and a portable stove with camping utensils are good early additions. If power cuts are your main worry, a generator might earn its place later, and a sturdy tent is a sensible shelter option.
Look at your shelter #
Your home is your first line of defence, so see how well it would stand up to the risks you identified. Consider structural soundness, how close you are to flood zones or fault lines, and how easily emergency services can reach you. Reinforce weak points where you can. That can mean stronger doors and windows, a security system, or fencing.
Choose a safe room or shelter-in-place area in your house. It should be central and easy to reach, with sturdy walls and door, and stocked with food, water, a first aid kit, flashlights and a way to communicate. Make sure everyone knows where it is and how to get there quickly. If your home is not safe at all, look at alternatives: a second location such as a cabin or a relative’s house, or something mobile like an RV.
Practise the skills #
Reading about fire is not the same as lighting one in the rain. Pick the skills that matter most and get hands-on practice.
- First aid. Take a course that covers CPR, wound care and fracture stabilisation. Refresh it regularly.
- Fire and cooking. Learn to start fires with a lighter, matches, flint and steel, or primitive methods, in different weather. Learn to cook on a camp stove or an improvised setup.
- Navigation. Use a compass and read a map without GPS. Hiking or orienteering is a good way to practise.
- Self-defence and basic survival. A self-defence class helps, as does learning situational awareness. Add shelter-building and finding water.
Build a support network #
You will be much better off with other people. Join local prepper groups or online communities. Get to know your neighbours, who can help immediately in an emergency, and find out what community organisations such as schools, churches and community centres have planned. Share what you know: teaching a friend how to treat a cut or build a fire makes your whole community stronger.
Agree on communication methods with your network. Phones and text may fail, so consider email, walkie-talkies and a system for checking in with each other.
Step 8: Pack a go bag #
A go bag, sometimes called a bug-out bag or 72-hour kit, is a portable kit that keeps you going for a short time if you have to leave. Make one for each member of the household and keep it somewhere you can grab it fast. Pack:
- food that needs no cooking, and plenty of water
- a first aid kit, a multi-tool, a flashlight and personal hygiene items
- copies of identification, insurance information and emergency contacts, plus prescriptions or a list of medications and doses
- sturdy shoes, warm clothing, rain gear and extra socks, chosen for your local climate
- masks, gloves and goggles for protection
Check the bag regularly and swap out anything that is old, expired or no longer fits.
Step 9: Keep informed #
Watch the news and weather so that you know about threats before they arrive. Learn the warning signs for the disasters in your region and the form evacuation orders take. Sign up for local government emergency alerts and keep a battery or crank radio so that you can still hear broadcasts if the power and internet are out. Using several channels improves your chance of getting the message.
Practise, maintain and keep learning #
Preparedness decays if you leave it alone. Review your plans from time to time and update them when your circumstances or risks change. Run drills: practise an evacuation, put up a temporary shelter, use your communication gear. Drills reveal gaps while mistakes are still cheap.
Go through your supplies on a schedule. Check expiry dates, rotate water, replace worn-out items, test batteries, sharpen knives, and keep everything clean and organised so it does not spoil. Update your first aid kit and medications, too.
Finally, keep learning. Try new techniques, follow developments in gear, and attend workshops or events when you can.
Where to go from here #
None of this has to happen at once. Work through the steps in order, and do each one properly before moving on to the next. Taking control of your own safety is the real point of prepping: once you have started, you are already in a better position than you were.
Related reading: Getting started with prepping