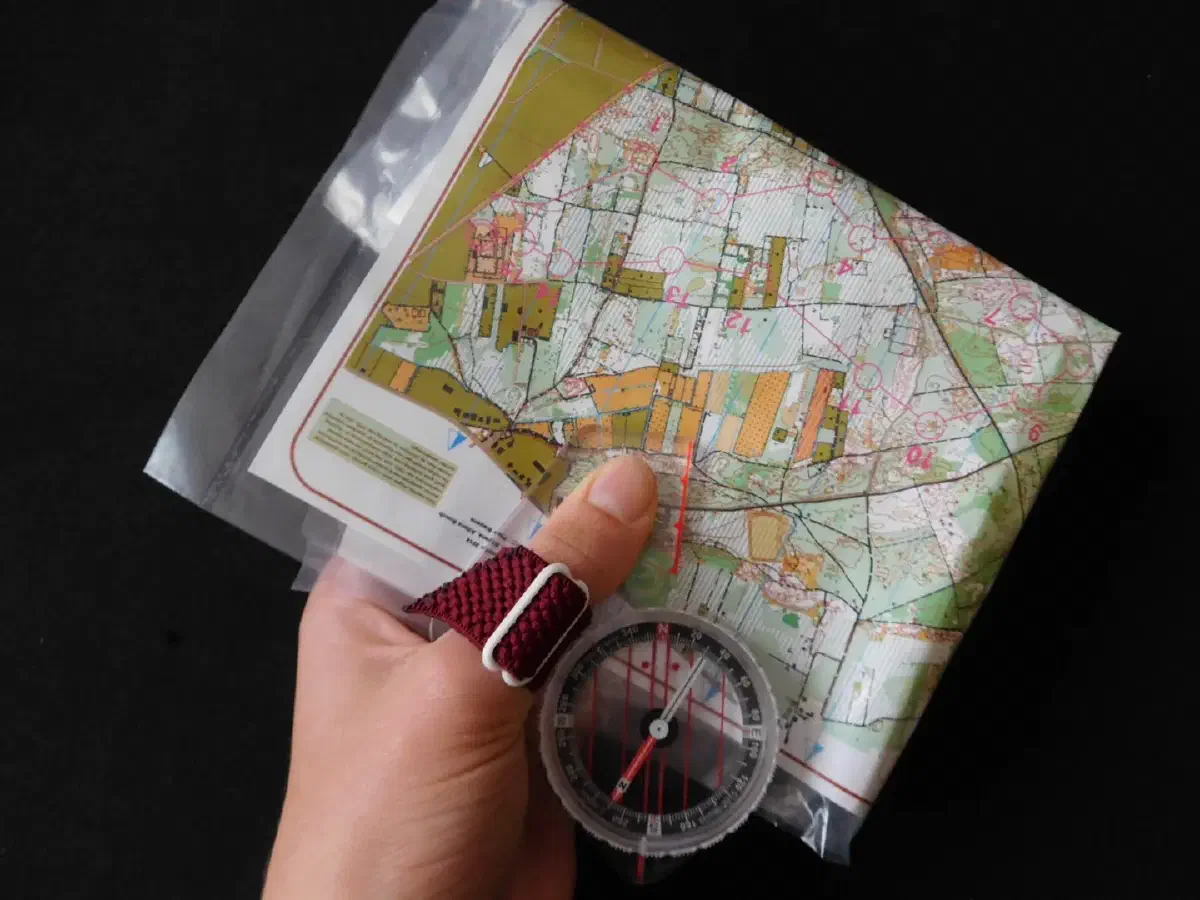
GPS works well until the battery dies or the unit breaks, and most of us cannot repair either one in the field. Those two flaws are enough to make a paper map and a baseplate compass the better primary system in grid-down situations, in bad weather, and anywhere signals are blocked by canyon walls or dense canopy. Neither tool needs power, both weigh almost nothing, and the skill that goes with them stays with you.
This guide takes the skills in the order you would use them: understand the map, understand the compass, combine them, then learn the techniques that keep you on course.
Reading a map #
Reading a map is the first step in any kind of navigation. If you cannot interpret it, the best compass in the world is not much use.
Choose the right map #
A topographic map shows terrain and elevation, along with roads, water and points of interest. It is the one hikers and backcountry travelers need. A road map covers a large area but leaves out the small features that matter on foot, so it is much less helpful for backcountry travel. Tourist maps help you find your way around an unfamiliar city. Nautical charts show water depths, buoys and other marine features, and are meant for use at sea.
Match the map to the job. Keep it in a waterproof case, since a wet, torn map is worse than none.
Scale #
Scale tells you how distances on the paper relate to the ground. A scale of 1:25,000 means one unit on the map equals 25,000 of the same unit on the ground. At 1:50,000, one centimeter on the map is 500 meters. The 1:25,000 map carries more detail, down to large rocks and big trees, but covers a smaller area, so a long trip may need several sheets. A larger area on one sheet means fewer details. You are always trading coverage for detail.
Legend, grid and north #
Check the legend first. It explains the symbols and colors, and you will not remember them all from one trip to the next. Then find the title, grid references, scale and north arrow. Grid lines give you a coordinate system for pinpointing locations.
Look for the magnetic declination as well. It is the difference between true north and magnetic north where you are, and a good map prints it. You need it to set your compass correctly. A map without a declination note should make you cautious.
Contour lines #
Contour lines connect points of equal elevation, and they let you see the shape of the land. Closely spaced lines mean steep ground, and widely spaced lines mean gentle slopes or flat terrain. Concentric rings indicate hills or peaks. V-shapes point to valleys, with the V pointing uphill. The contour interval, which is the vertical distance between lines, is printed on the map. On some 1:50,000 maps it is about 10 meters, but always check the one you are carrying.
Look for spurs, summits, saddles and re-entrants, because they are the features you will match against the ground. If you can read contours, you can plan routes that avoid cliffs and long climbs before you ever see them.
Orienting the map #
Orienting the map means turning it so that it matches the landscape. There are three ways to do it.
- With a known landmark. Find a prominent feature you can see on the ground and also identify on the map, such as a peak or a distinctive building. Turn the map until the two line up.
- With a compass. Lay the compass flat on the map and line up its edge with the north-south grid lines. Rotate the map and compass together until the needle lies along the compass’s north-south alignment.
- With the terrain. If you have no compass or landmark, line up features that appear on both the map and the ground, such as a stream or a road.
Once the map is oriented, find your position by relating what you see to what the map shows. Rivers, mountains, walls, roads, saddles and spurs are all useful.
Understanding the compass #
The parts #
A baseplate compass has a few parts worth knowing by name:
- Baseplate: the flat, clear base with a ruler, map scale and a direction-of-travel arrow. Some baseplates include a magnifying lens.
- Needle: a magnetized pointer that aligns with the Earth’s magnetic field, so the red end points to magnetic north.
- Rotating housing (degree dial): marked in degrees, used to set and read bearings.
- Orienting arrow: the arrow printed on the floor of the housing, used to line the needle up.
- Index line: where you read the bearing on the dial.
Using it properly #
Hold the compass flat. When it is level, the air bubble in the housing sits at the center of the chamber, and the needle swings freely. Keep metal and magnets away from it, because belt buckles, knives, phones and vehicles can pull the needle off and give you a bad reading. Take multiple readings to check consistency.
Magnetic north and true north #
Magnetic north and true north are not the same, and the gap between them varies by location. That gap is the declination. Adjust for it by rotating the housing by the declination amount, so your bearings match the grid lines on the map. Skipping this step can send you well off course on a long leg, especially in places where declination is large.
Using map and compass together #
Taking a bearing from the map #
- Place the long edge of the baseplate on the map so it connects where you are with where you want to go, and the direction-of-travel arrow points toward the destination.
- Rotate the housing until the orienting lines inside it are parallel to the map’s north-south grid lines, with the orienting arrow pointing to the top of the map.
- Adjust for declination if you need to.
- Read the bearing at the index line.
Following the bearing #
Lift the compass off the map and hold it level in front of you. Turn your whole body until the red end of the needle sits inside the orienting arrow. The direction-of-travel arrow now points the way you need to walk. Pick an object ahead on that line, such as a rock or a tree, walk to it, and then repeat. Do not stare at the compass while you walk. You will drift and bump into things.
Taking a bearing in the field #
To take a bearing to something you can see, point the direction-of-travel arrow at it, rotate the housing until the needle sits in the orienting arrow, and read the bearing at the index line. Hold the compass level and steady, since tilting it can affect the reading.
Finding your position with bearings #
If you can take bearings on two or more recognizable landmarks, you can work out where you are. Take a bearing to each landmark, convert it to a line on the map, and draw those lines from the landmarks. Their intersection is your position. A third bearing gives you a check, since the lines form a small triangle when your readings are slightly off. Pick landmarks that are well apart, ideally from different directions, because two lines that nearly overlap give a poor fix.
Back bearings #
A back bearing runs from a known landmark behind you to confirm your position or check that you stayed on course. It is a quick way to tell whether your progress matches your plan.
Measuring distance #
Use the map scale to convert distance on the map into distance on the ground. A ruler or the scale on the baseplate works fine. For a longer route, break it into legs.
Pacing gives you distance on the ground. Walk a known distance, count your steps, and work out how many it takes you to cover a given length. Once you know your pace count, you can track distance as you walk, and in the field a compass keeps you on a straight line while you count. Your count will change on steep slopes, rough ground or when you carry a heavy pack, so adjust for conditions.
When you cannot measure precisely, estimate by comparing the size of known features, such as roads or rivers, with how they appear on the map.
Planning a route #
Before you start, choose checkpoints. These can be landmarks, junctions or specific coordinates. Mark them on the map and note the distance and expected time to each one. Look for navigation aids along the way, such as trails, roads and rivers, which simplify the route and give you backup options. Connect your checkpoints with the best path, considering terrain, elevation changes and obstacles, and record distance and estimated arrival times.
Thumbing the map helps you keep track of your position. Keep a thumb on your current location as you travel and move it along. If you stop to look around, you do not lose your place, and if you put the map away, you can still find your last known position.
Techniques that save time and trouble #
- Handrailing. Follow a linear feature such as a trail, a stream or a ridge, checking your map and compass from time to time.
- Aiming off. When your target is on a linear feature, such as a trail junction on a river, deliberately aim to one side. When you reach the feature, you know which way to turn.
- Attack points. Navigate first to a prominent feature near the destination, then make a short, accurate final approach.
- Dead reckoning. Estimate your position from your last known point, direction and distance. It is useful where landmarks are scarce.
Poor conditions #
Fog, heavy rain, snow and darkness take away the landmarks that make navigation easy, so compass work matters more. In compass-only travel, take accurate bearings, keep legs short and check your pacing. At night, carry a reliable light source, such as a headlamp, for reading the map and compass. In poor visibility, lean on features that are hard to miss, such as marked trails, and be careful with your decisions.
Habits worth keeping #
Stay oriented. Always know where you are on the map and which direction you are facing. Practice in different kinds of terrain, not just on a clear day on a well-marked trail. Plan your route before you set out, and stay calm if you lose track of where you are. Stop, breathe, look at your surroundings and work back through your last known position. If you are really stuck, ask for help from experienced hikers or park rangers. Asking for help is a safety step, not a failure.
Reading about navigation only gets you so far. If you can, learn from an experienced navigator in person, since correcting small mistakes in the field is the fastest way to build the skill. These skills can save your life, and the lives of the people with you.
Related reading: the full survival skills guide; Navigating Without a Compass or GPS.